Sample analysis
This workflow handles the physical custody of samples, sample IDs and labels, tests, execution evidence, results, and the validation handoff.
The correct order
Do not start work before sample receipt
Mark Samples Received is the physical intake step. It records the received quantity and creates the initial QIAS LIMS sample records. Start Work becomes available only after this step.
1. Receive samples and issue IDs
Open the job’s Sample Workflow tab and use Mark Samples Received. Confirm the received count against the request and physical delivery. QIAS LIMS issues a unique ID for every received sample.
Use this action for the first sample records. Add Samples (correction) is only for a late container or a correction after the initial receipt; it is not a substitute for receipt.
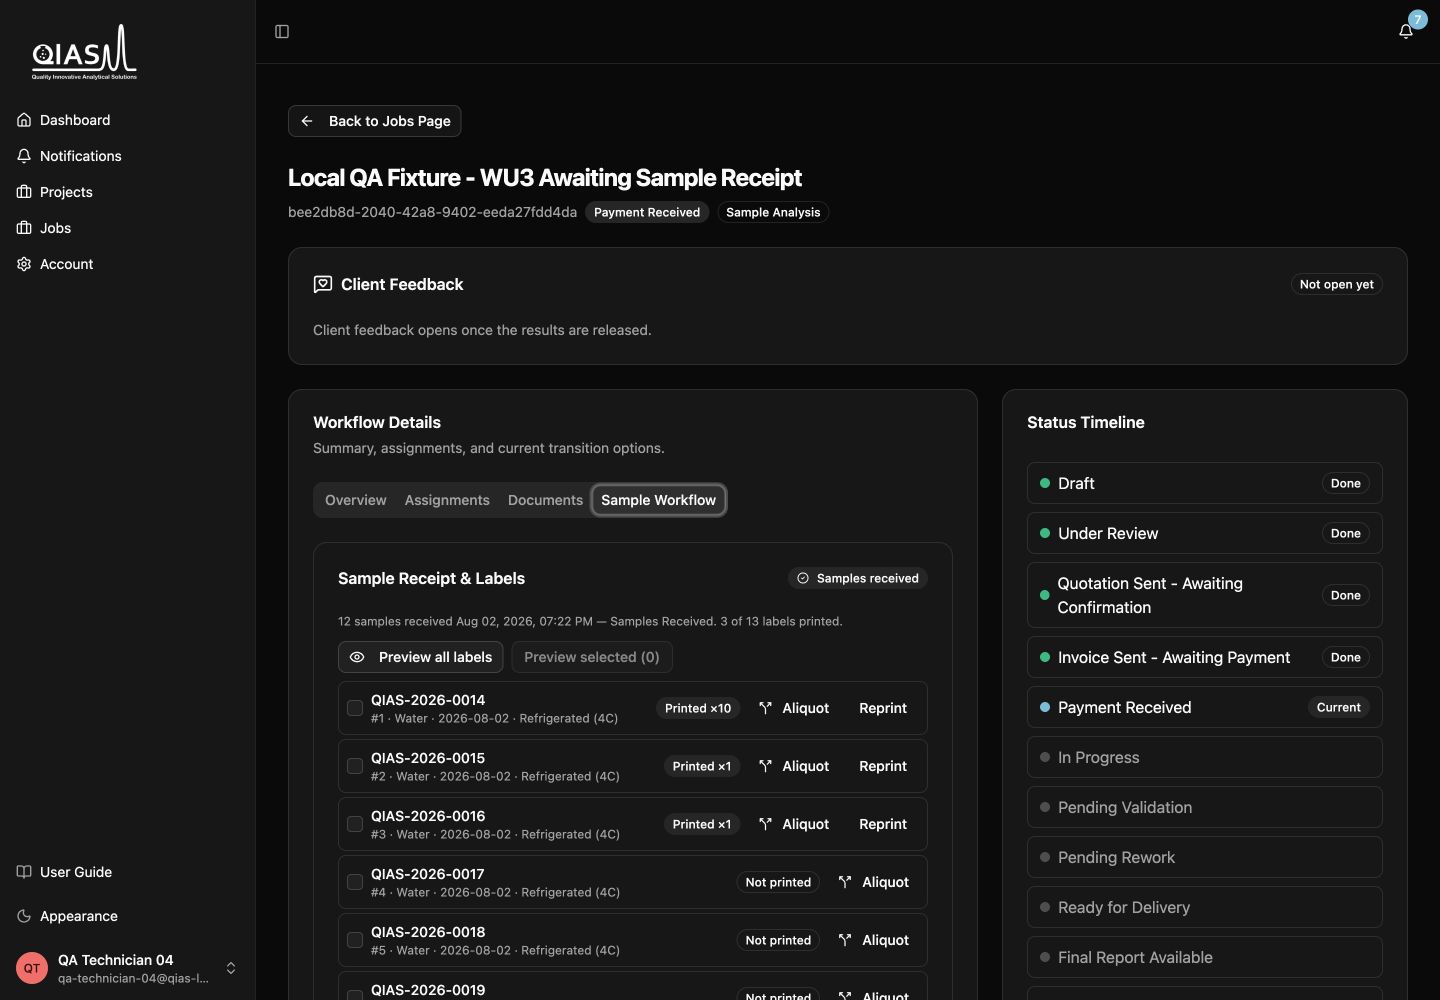
2. Print and apply labels
Open Sample Receipt & Labels to preview labels before producing them. See Sample labels and printing for the browser, ZPL, scanner, and QZ Tray options.
Apply the correct label to the matching physical container immediately. If you must reproduce an already printed label, use the reprint action and provide the required reason.
3. Start work
Once receipt is complete and you are the assigned technician, select Start Work in the job’s Next Action panel. The job status becomes In Progress.
4. Create and manage tests
In Sample Workflow → Tests:
- Select the sample or aliquot to test.
- Add a test with its analytical method, analyte or test name, and any required notes.
- Select an existing test to make it the active work item.
- Record execution metadata for that selected test.
- Move the test through its permitted status actions and save the result.
The execution fields capture operational context such as QC, calibration, instrument/run information, and raw-data metadata. Results capture the final measured value and supporting fields such as unit, LOD, and LOQ when applicable.
What the Tests area means: first choose the container or aliquot, then create a test. Select that test before entering execution evidence or its measured result. The lower form always applies to the currently selected test, not every sample in the list.
Work one selected test at a time
The lower execution-and-result section applies to the test currently selected in the Tests list. Check the selected test name and status before saving details or transitioning it.
5. Aliquots and corrections
Create an aliquot when a parent sample needs a derived container. QIAS LIMS shows the child under its parent and preserves lineage so the result remains traceable. A late sample can be added through the correction action after receipt, where it receives its own QIAS sample ID and label.
6. Complete and submit
When all required tests are complete:
- Upload the final report through the governed document flow.
- Upload any required certificate of analysis (CoA).
- Use Submit for Review from the job’s Next Action panel.
The reviewer handles approval or a request for changes. See Validation and rework.